
|
EZField - How to use the Kinematic mode |
|
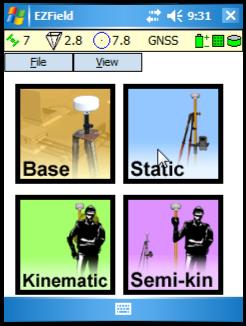
The kinematic mode allows to collect sites (points), lines and polygon. The resulting accuracy will vary according to the type of receiver used and the environment. Post-processing the survey file will increase the accuracy and its reliability.
To start the Kinematic mode, click on the Kinematic icon . To can set configurations specific to the mode of operation, refer to Configure Alarms article for more details. |
|
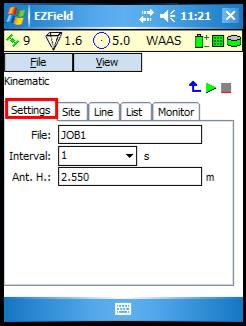
The Settings tab allows to configure the survey file. ■ Name the File or use the file name proposed (for details, refer to Automatic file naming convention or Automatic file naming for multiple field crew) ■ Define the data rate (the recording Interval) ■ Enter the Antenna Height (Ant.H.); normally it is the rod height |
|
When you are ready to start recording your file, click on
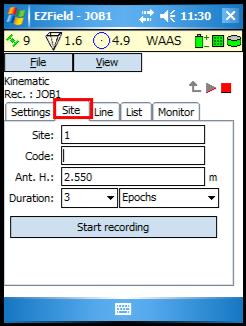
The Site tab allows you to record sites while the Line tab allows to record lines or polygons. |
|
To record a Site: ■ Enter a Site number. You can define an Auto Increment value with File > Preferences > Kinematic. ■ If desired, you can enter a Code (Pcode) for the site. ■ Enter the Antenna Height (Ant.H.) if different from the one proposed (Ant. H. entered for the file is proposed). ■ You can define a Duration in terms of Epochs or Seconds (use the & Up option to record the minimum Duration you’ve set and, if the user stays longer at the site, all additional epochs/seconds will be used when you process the site). ■ Click on the Start Recording button to record a point. ■ To save the site, click on Commit. You can set the Auto Commit option with File > Preferences > Kinematic to save automatically the site once the set duration has been reached. |
|
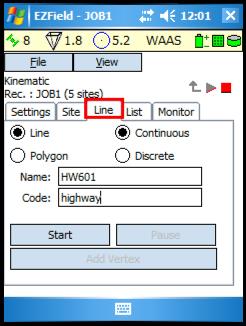
To record a line or a polygon: ■ Select if you want to record a Line or a Polygon. ■ Select if you want it to be Continuous (vertices are added automatically according to the file data interval) or Discrete (vertices are added manually with the Add Vertex button). At any time, when recording a line or a polygon, you can switch it from Continuous to Discrete and vice versa. ■ Enter a Name for your line or polygon. ■ If desired, you can enter a Code. ■ Click the Start button to start recording the line or polygon. ■ Click the Pause (or Resume) button to pause the line or polygon. ■ Click the Add Vertex button to add vertices into your line or polygon. You can define a duration for manually added vertices with File > Preferences > Kinematic. ■ Click the Stop button (when a line or polygon is started, the Start button changes for Stop) to stop recording the line or polygon. |
|
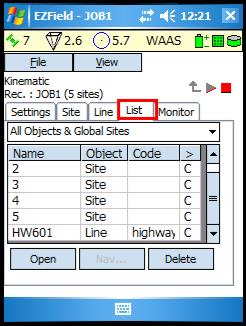
At any time, when recording a file, you can access the List tab to view the recorded features and their status You can filter the table displayed with the drop-down list
When you select an object from the table you can: ■ Open it a. Open a site to modify its name or code. b. Open a line or polygon to complete it. ■ Navigate to it (refer to How to navigate article for more details). ■ Delete it. |
|
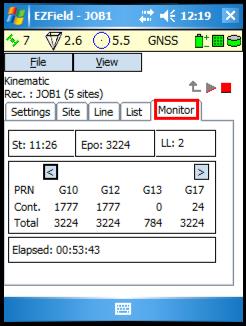
At any time, when recording a file, you can access the Monitor tab.
The Monitor tab give the following information: ■ The Start time. ■ The number of Epochs recorded. ■ Cycle slips, if any (LL: Loss of lock observed so far). ■ The satellite code (PRN) along with the number of epochs recorded. The Cont. row shows the number of consecutive epochs without cycle slip for each observed satellites while the Total row shows the total number of epochs recorded for every observed satellite. ■ The Elapsed time since the file has been started. |
|
When you finished your survey and want to stop it, click on When the file has been stopped, you can go back to the main menu (operation modes) by clicking on |
|
Article: 000098 Related Products: EZField Last Update: 2017-11-06 19:50:42 |
|
Document information |
|
|