|
FieldGenius data collection - Not using FieldGenius at the base |
|
There are several different ways to collect data with FieldGenius so that it can be post-processed. The complete list of use cases can be found in the article FieldGenius data collection - Overview. This article explains how to collect data using a base and a rover without using FieldGenius at the base. |
|
Step by step instructions |
|
1. Connect to your base with FieldGenius and get to GNSS Raw Data Logging screen. Detailed instructions how to connect to the base receiver can be found in the article Base & Rover in the same project. 2. Activate the option Auto start logging after power cycle. 3. Install your base on the field and turn it on; the raw data logging should start automatically. If the base is installed on a point with known coordinates, these coordinates can be entered later in EZSurv. |
|
Auto start the base |
|
Rover setup |
|
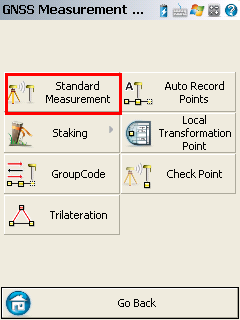
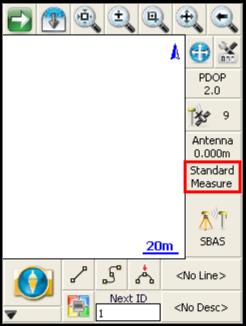
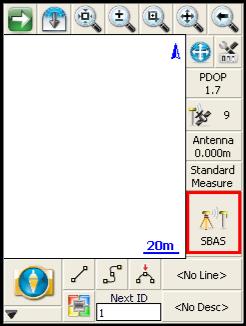
11. Press the button labelled Standard Measure to define the Measurement Mode to be used to collect points. |
|
Collecting features |
|
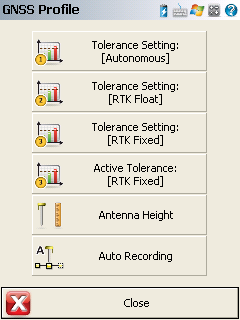
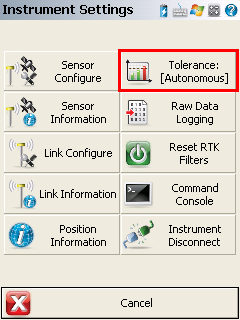
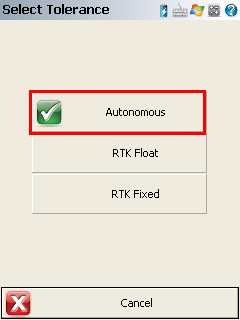
13. Once you finished customizing the tolerances, select one of them using the upper right button in Instrument Settings window. |
|
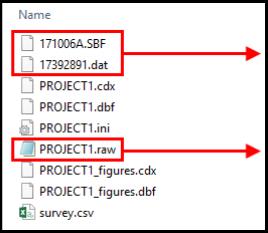
After the survey |
|
18. Once the survey is completed, download the data from the Mobile Device and from the SD cards of the receivers (base and rover). 19. Make sure all files are saved in the same folder (see an example below). 20. The field data is now ready to be post-processed. Refer to the article How to process GNSS data recorded using FieldGenius for further instructions. |
|
Note: File names given here are for demonstration only. They will vary depending on the receiver you’re using and how you named your project. |
|
Project file from the data collector for the base and for the rover. Import this file in the post-processor to process the features. |
|
The binary (or RINEX) files from the base and the rover will be automatically imported with the corresponding *.raw file. |
|
■ Observations: Number of epochs to record for a point. ■ Solution: Minimum solution type to record a position. If you want to post-process your data, always use “AUTONOMOUS”; at best, RTK position will be recorded, at worse, a lower quality position will be recorded now and will be replaced later by a higher quality post-processed position. ■ Elevation: Required elevation mask. ■ PDOP: Minimum PDOP to consider a epoch as valid. ■ Satellites Computed: Minimum number of satellite to consider a epoch as valid (5 is good). ■ StdDev Horizontal: Minimum horizontal standard deviation to consider an a epoch as valid (always put a high number if you want to post process your data). ■ StdDev Vertical: Minimum vertical standard deviation to consider an a epoch as valid (always put a high number if you want to post process your data). ■ Post Process: Do not check this option. |
|
Article: 000102 Related Products: EZSurv Last Update: 2017-11-14 14:04:20 |
|
Document information |
|
|
|
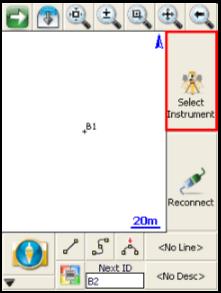
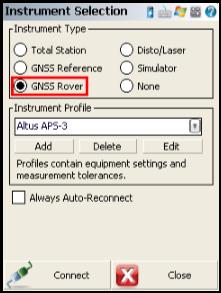
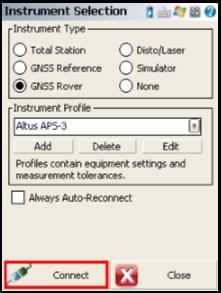
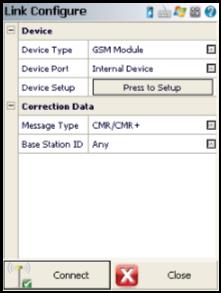
4. Press Select Instrument to open Instrument Selection window. 5. Select GNSS Rover. If you have already created a profile for the receiver, select it from the menu. To create a new profile, press Add. See steps 5 to 9 to set the receiver model, communication port and antenna height. In this example, we are using Altus APS-3 for the rover. 6. Press Connect. 7. When the connection is established, the In Link Configure window appears. - If you configured your local base to transmit corrections in step 20, press Connect to receive these corrections. - If your local base is not sending corrections, press Close. |
|
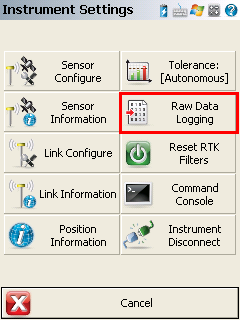
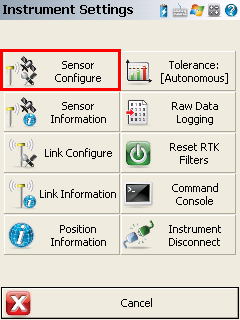
12. To set the tolerances, press Instrument Settings and Sensor Configure. There are different tolerance settings to choose from. See a detailed information about Tolerance Setting below. |

|
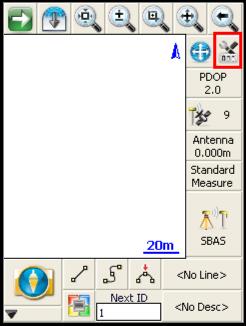
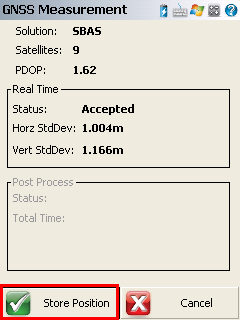
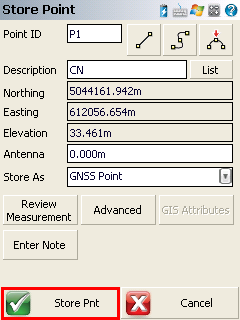
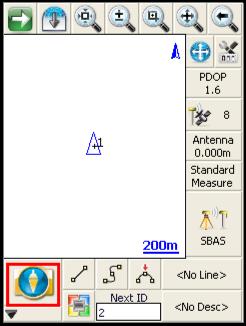
14. To collect a feature, press on the action button. |

|
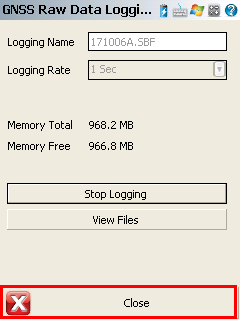
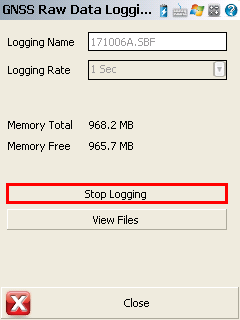
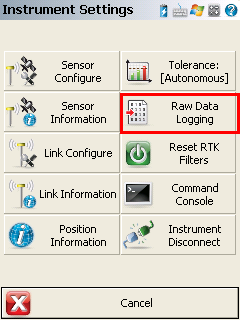
15. When finished collecting data, stop the raw data logging on the rover by going to Instrument Settings > Raw Data Logging > Stop Logging. |
|
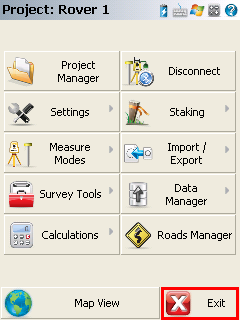
16. To close the project and the software, press the main button, select Exit and confirm by pressing on Yes. 17. Finally, stop the base receiver by powering it off. |
|
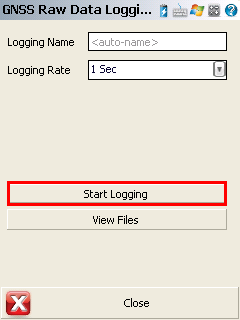
8. In Map View, press Instrument Settings button then Raw Data Logging. 9. On the next screen, make sure the Logging Rate value is set to 1 second. 10. Press Start Logging. Shortly after, <auto name> will be replaced by the name of the new log file. Press Close to continue. It is CRITICAL to start the raw data logging before following the next steps. |