
|
How to create a custom Mapping System |
|
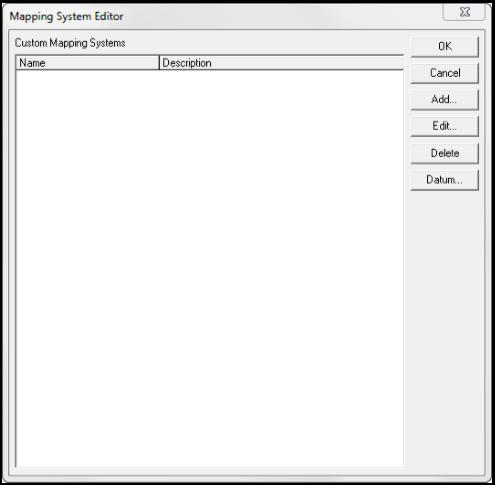
Creating a new mapping system On your PC, start OnPOZ Tools > Mapping System Editor; |
|
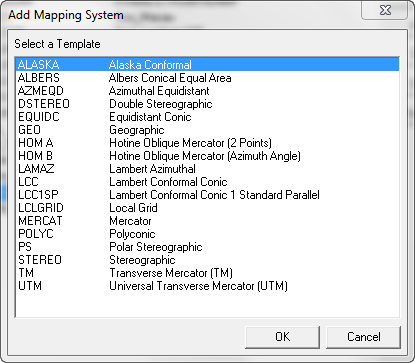
Click Add... to create a new Mapping System. The Add Mapping System window will be displayed with all the available projection templates: |
|
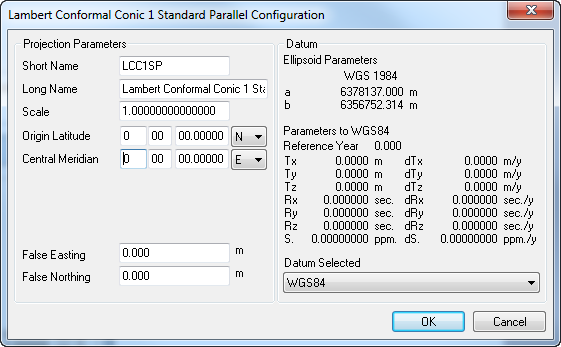
From this list, select the projection template required and fill it with your local parameters. As an example, here is the template to create a Lambert Conformal Conic with 1 standard Parallel: |
|
From there: 1. Input a Short name; 2. Input a Long name which is the name that will be displayed in all the reports; 3. Input all the technical parameters (you should verify with your local authority to make sure that you are using proper parameters); 4. Select your Datum. If it is not available, temporarily save the custom mapping you’re currently editing by pressing OK and add the Datum by using the “Datum” button in the Mapping System Editor; 5. Click OK and your custom Mapping System will now be displayed in the Mapping System Editor.
Each template as typical “Projection Parameters”; users with a minimum experience should be able to set them properly. |
|
A mapping system cannot be created on the Windows Mobile Device; you need to create it on your Windows powered device with OnPOZ Tools. Once created, you will need to update the mapping system list of the mobile application (refer to Modify the Mapping system list for more details). |
|
Article: 000058 Related Products: EZField, EZTag CE, OnPOZ Tools Last Update: 2016-07-14 18:44:15 |
|
Document information |
|
|