
|
Create a custom data dictionary |
|
How to create a custom data dictionary |
|
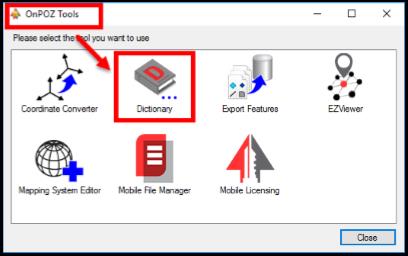
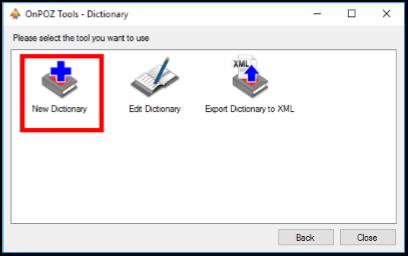
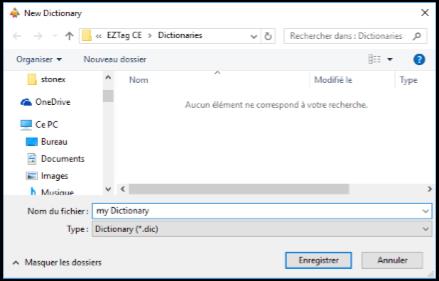
1. On your Windows powered device, Start OnPOZ Tools (All Programs > OnPOZ ); 2. Select the Dictionary icon and then the New Dictionary icon; 3. Give a File name to your dictionary and Save it (note where you save it); |
|
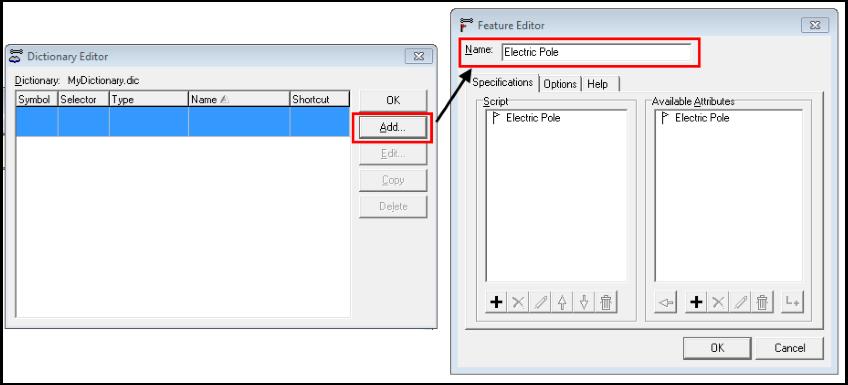
4. The Dictionary Editor allows you to Add… features into your data dictionary and give it a Name (eg. Electric Pole); |
|
The default dictionary available allows you to capture points, lines and polygons features. For more flexibility, in regards to features and attributes, you can create your own dictionary with the dictionary editor found in OnPOZ Tools on your Windows powered device. Once created, you’ll need to upload your custom dictionary on the field device working folder in order to use it with EZTag CE. Please note that the data dictionary structure cannot be modified in EZTag CE. |
|
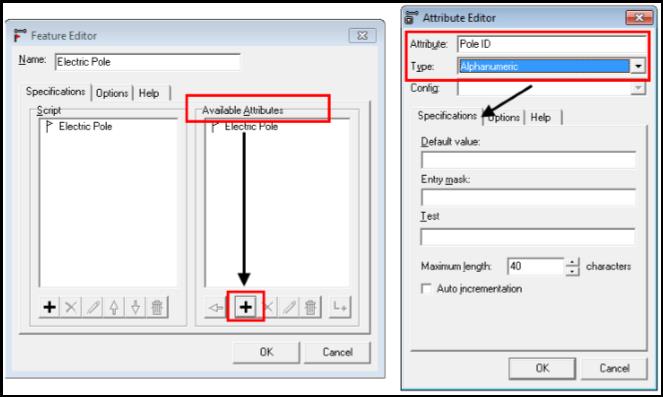
5. The Feature Editor allows you to add 6. Add your attributes into the Available Attributes section; 7. Enter the Attribute name (eg. Pole ID) and select the attribute Type (eg. Alphanumeric value); 8. Complete the Specifications Tab, the Tab content will varies according to the selected attribute Type; |
|
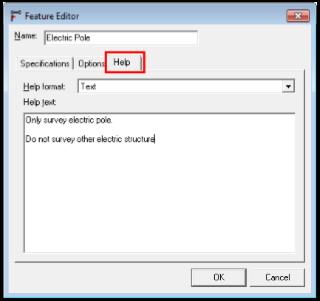
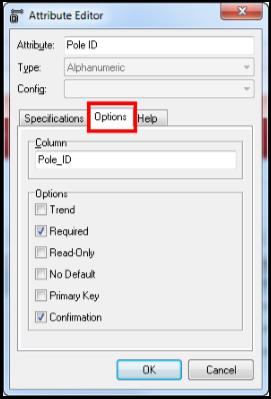
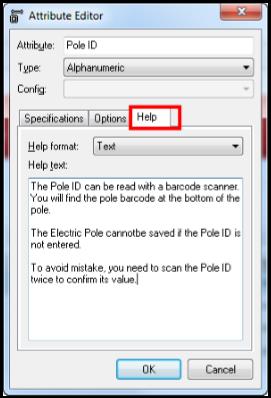
9. Use the Options tab to enter additional validation for the attribute (to avoid mistakes on the field); 10. Use the Help tab to provide a custom help to the field crew regarding the attribute; 11. Press OK to save the attribute; |
|
Attribute Type:
Single choice: you can select one value within a given list of values (eg. the pole owner).
Multiple choices: you can select many values within a given list of values (eg. the treatments given to the pole).
Picture: only for field devices that includes an integrated camera.
For detailed information on attribute Types refer to EZTag CE user guide. Each type of attributes is defined along with its associated Specification Tab. |
|
Validation Options:
Trend: the last entry for the attribute value becomes the trend (the default value); if the user enters a different attribute value during the job (he breaks the trend), a warning is given and the new value becomes the trend (the new default).
Required: the features cannot be saved if you do not visit this attribute.
Primary Key: the attribute value is unique; if the value has been entered previously in current survey file, EZTag CE will not let you enter the value twice.
Confirmation: the user needs to enter the attribute value twice for validation purpose (EZTag CE makes the validation).
For detailed information on validations options, refer to EZTag CE user guide. |
|
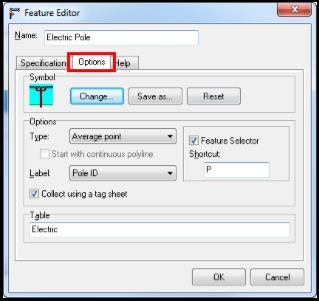
14. Once the Script is completed, use the Help tab to provide a detailed and specific information to the field crew regarding the feature; 15. Use the Options tab to define your feature (Symbol, feature Type, Label and keypad Shortcut); |
|
Feature Type:
A Point feature only has one epoch while an Average point feature has a duration (3 average points are available, meaning 3 different durations can be defined).
Line feature can be defined Continuous or Discrete (straight line between line vertices). At any time the field technician can switch from continuous line to discrete line.
A Polygon feature is a line feature that closes on its first line vertex. |
|
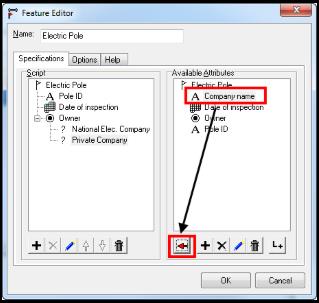
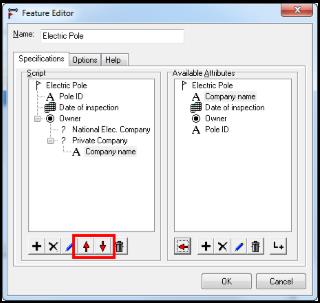
12. You can add 13. Once all attributes are added for a specific feature, select an attribute and move |
|
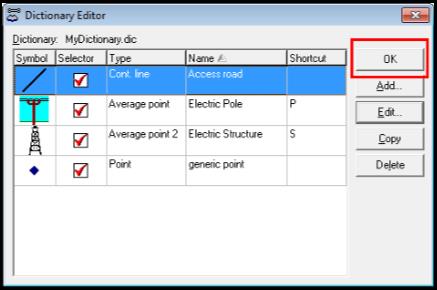
18. You can add 19. Once all features are added for a specific data dictionary, press OK to save the data dictionary; |
|
20. To use your data dictionary in EZTag CE, refer to the article Use a custom data dictionary in EZTag CE. |
|
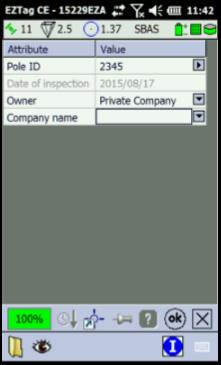
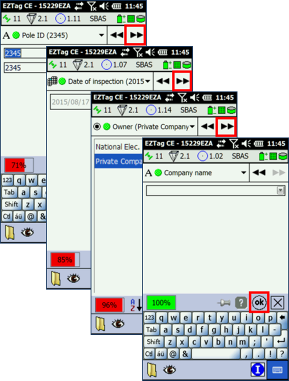
16. Also under the Option tab, the checkbox Collect using a tag sheet allows to define if you want the attributes to be displayed one by one (default display) or if you want them to show all at once into a single tag sheet (form display). IMPORTANT: a relational feature (a feature with an attribute of type Feature Link) cannot be displayed as a tag sheet. 17. Press OK to save the feature. |
|
Default display versus |
|
Article: 000050 Related Products: EZTag CE, OnPOZ Tools Last Update: 2017-04-05 20:55:21 |
|
Document information |
|
|