
|
Configure GNSS Control Panel for your GNSS receiver |
|
In GNSS Control Panel, you need to indicate the COM port used by the GNSS receiver and its output protocol. |
|
What COM Port and GNSS output protocol should be selected? |
|
Internal GNSS receiver The table below present information for a few devices with Internal GNSS receivers. For other devices, refer to your vendor for details. |
|
The receiver must be connected to a physical COM port rather than a virtual port. To avoid being connected to a virtual port, please review the following settings:
1. Open the External GPS or GPS settings found under Start > Settings > System; 2. Programs tab : select None for the GPS program port; 3. Access tab : uncheck Manage GPS automatically; 4. Hardware tab: select None for the GPS hardware port; 5. Press OK to close the settings. |
|
External GNSS receiver If you are using a Bluetooth GNSS receiver, you must do the Bluetooth pairing first to define the COM Port that will be used by the receiver. For more details on Bluetooth pairing, refer to our knowledge base article External GNSS receiver - Bluetooth pairing For external GNSS receivers, the name of the output Protocol is usually equivalent to the GNSS receiver brand name. |
|
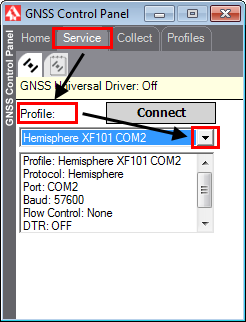
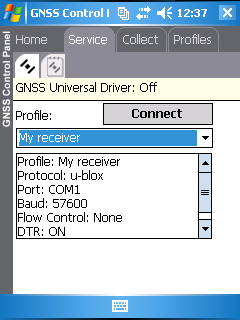
How to select the COM Port and the output protocol in GNSS Control Panel 1. Start GNSS Control Panel found under the Start menu (or Start > Programs or Start > All Programs > OnPOZ); 2. The Service tab allows to use a pre-defined Profile. A Profile is mainly defined by a GNSS Protocol (output format), a Com Port (com port used by the receiver) and a Baud rate; ■ If your receiver is available in the Profile drop down list, simply select it and click Connect (you should go outside to connect with your receiver). |
|
In order to post-process your GNSS data, the GNSS receiver MUST be configured to output raw binary observations (rather than NMEA). For more details on GNSS receiver output configuration, refer to our knowledge base article Internal GNSS receiver - Configuration |
|
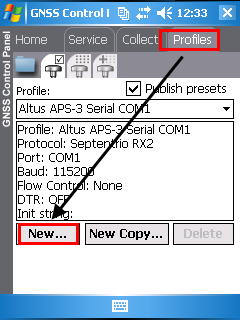
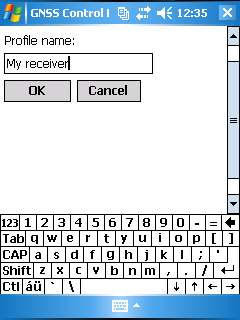
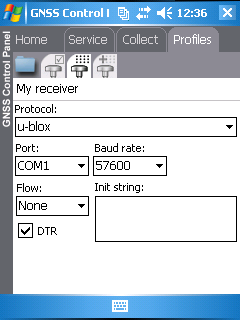
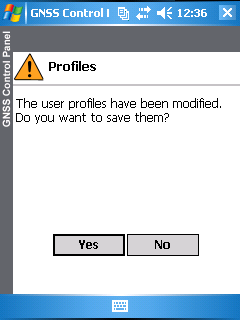
■ If your receiver is not available in the drop down list, click on the Profiles tab and create a New profile for your receiver. a. Give a Profile name; b. Complete the information relative to your receiver; c. Once completed, click on the Service tab; you will be asked to save your profiles; d. Use the Service tab Profile drop-down list and select the profile you created; e. Click on Connect (you should go outside to connect with your receiver). |
|
Article: 000083 Related Products: GNSS Control Panel Last Update: 2017-08-07 17:46:58 |
|
Document information |
|
|
|
Device brand |
COM port |
GNSS Driver (Binary format) |
|
Magellan eXplorist Pro10 |
COM3 |
SiRF Lite |
|
Geneq SXPad |
COM3 |
SiRF Lite |
|
Archer 2 (according to the internal receiver brand) |
COM8 |
Archer2 - NVS Archer2 - uBlox_M8T |
|
Allegro 2 (according to the internal receiver brand) |
COM8 |
Allegro2 - NVS Allegro2 - uBlox_M8T |
|
BAP Precision / Flint (GPS only) |
COM4 |
FLINT - uBlox |
|
BAP Precision S812A (GNSS model) |
COM4 |
BAP-S812A - uBlox_M8T |
|
Mesa 2 |
The com port assigned by Windows 10/11 is displayed under Control Panel / Device Manager / Ports |
Mesa2 - uBlox_M8T |
|
Nautiz X7 |
COM4 |
SiRF Lite |