|
Processing Trajectory using your own Base Station |
|
Trajectory Data ■ Static (Base Station) files can originate from a Base Station provider (public or commercial) or can come from data collected by the user on a known marker (used as reference). This file can be in a binary or RINEX format. ■ Kinematic (Rover) files are from a binary file recorded directly on any recording device (SD card on the receiver, PDA, PC, etc.). ■ Although you can create a trajectory manually, simultaneous datasets are automatically recognized by EZSurv in the processing. There is no need to specify matching files (e.g. static and kinematic combinations). |
|
A Few Settings... EZSurv automatically generates all trajectories using field metadata. This metadata consist of the start and end time of each observation file, the definition of each files and the distance between the rover and the base. Knowing this you can understand that there is some settings to check prior to launching the automatic processing.
■ If you want to use a Base Station from a specific provider, select it as your Favorite. To do this, go to Tools > Base Station > Provider Manager, select the provider and click on the button Set Favorite. If you omit this step EZSurv will select the closest base station among all the Providers surrounding your area. If you have only one Provider in your area, you do not have to do this setting. ■ It is also important to make sure that Maximum distance to match reference option is checked and that you entered a proper distance tolerance (maximum distance between rover and base). |
|
■ Set your mapping coordinates using the Mapping Systems window found from the main menu under Tools > Mapping Systems > Selector.... This window lets you select existing mapping system or create new ones using Tools > Mapping Systems > Editor. After their creation, these new mapping systems are available under the Custom tab of the Mapping System Creator. ■ You can select your preferred unit of measure in the General tab from the Tools > Options... Look for the Units section and select your unit of measure (International Feet, Metric or US Survey Feet). |
|
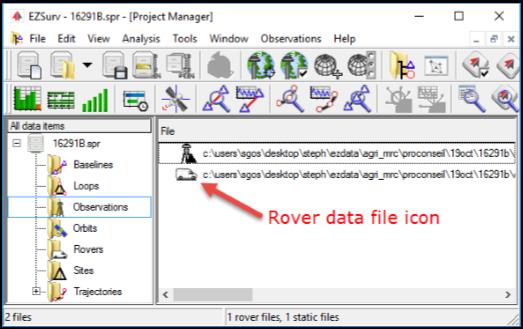
Importing your Rover Observation Files ■ Transfer your GNSS data files to your PC; ■ Select Observations > Import… or simply drag and drop your files into the observations folder of the Post-Processor; ■ If needed, set your kinematic antenna model and height from Edit > Rover. |

|
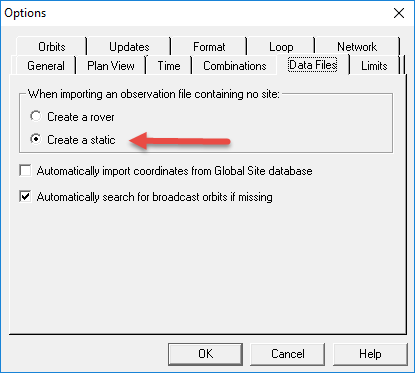
Importing your own Base Station Files It is suggested to manage data collection on a daily basis. We also suggest that each daily folder contains a subfolder for the original data files collected on the field and another one for the post-processing project files. All your files from the same survey or collected on the same day can be in a single folder. If you recorded your Base Station in a binary format (the native format of your receiver), make sure to select the Create a static option found in Tools > Options… > Data File tab. This option will ensure that a file containing no site information will be interpreted as a static file at importation. |
|
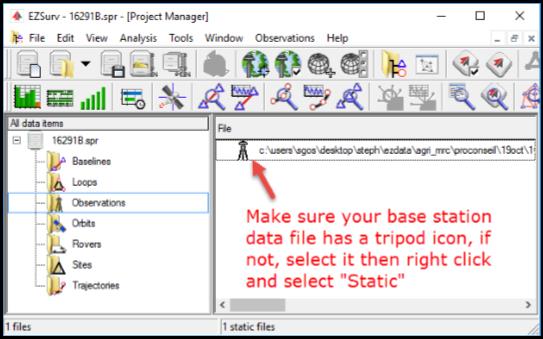
You are now ready to transfer the base station data file from your PC. ■ Select Observations > Import… or simply drag and drop your files into the observations folder of the Post-Processor. |
|
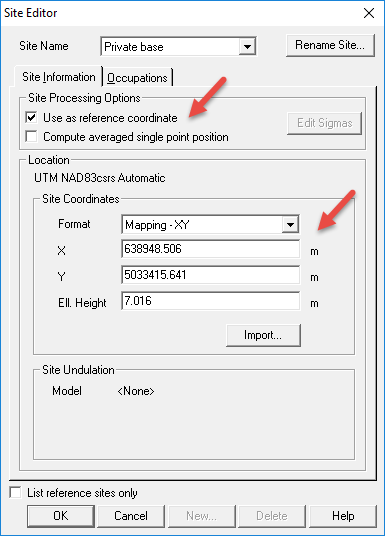
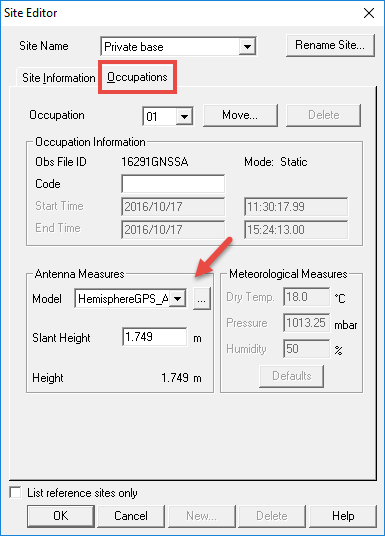
Set your Base Station as a “Reference Site” Go to the Site Editor using Edit > Site. Check the Use as reference Coordinate box and enter its coordinate (make sure you are using the proper datum). Using the Occupation tab of the Site Editor, enter its antenna model and height. |
|
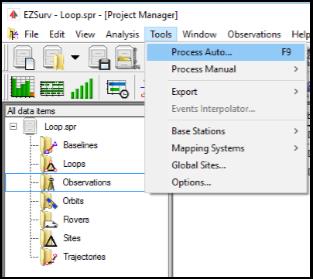
Launch the Automatic Processing Select Tools > Process Auto... to start the GNSS post-processing (also available by pressing F9 on the keyboard). The following steps are performed automatically:
■ Scan for base stations; ■ Merge base station data (if required); ■ Define trajectories / baselines (find out which Base file match which Rover files); ■ Post-process the data. |
|
When the processing is completed, a Process Summary is displayed, from there you can do the following:
■ View your results graphically (View > Plan View); ■ Analyze your results (Analysis > Trajectory Results); ■ Export your epoch to epoch positions (Tools > Export > Trajectories). |
|
Article: 000041 Related Products: EZSurv Last Update: 2017-03-30 20:05:44 |
|
Document information |
|
|

